Related Resources
OrderPort makes wine club releases simple. This lesson covers the wine club release process for Winemaker Selects and Customer Choice clubs.
Page Contents
Before the Release (Customer Choice)
Once in the Wine Club module, go to the Wine Clubs tab. Open the club you’d like to create a release for. If you are using a winemaker selects club, you can proceed to creating a release.
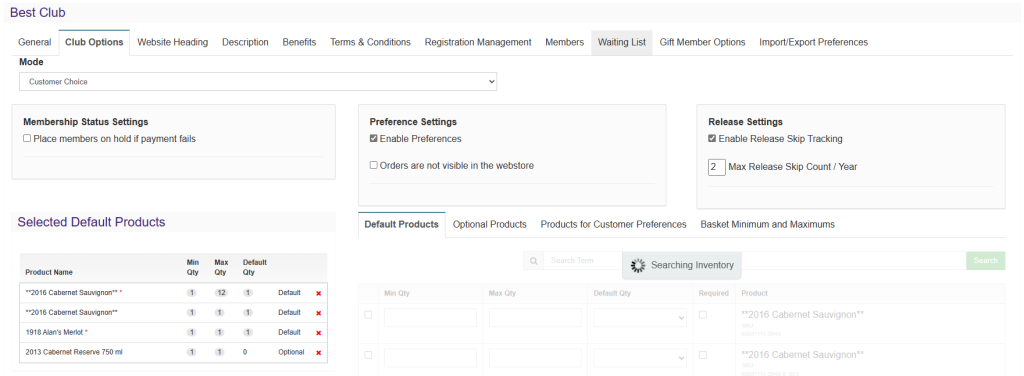
If you are using a customer choice club, you need to select the products prior to creating the release. Go to the Club Options tab, then configure the default options of the release. You can add optional additions that the members may choose to include in their cart. Finally, set a basket minimum to ensure members do not edit their carts to have less than the default quantity of bottles.

Starting the Release
Proceed by clicking on the Release in Progress tab. Click Create Club Release, and give the release a name.

You will also give the release an initial build. Each release is done through one or more builds. A build is simply a portion of the members you’d like to process together as a group. For example, you may wish to put your shipping and pickup members in separate builds.
Step 1
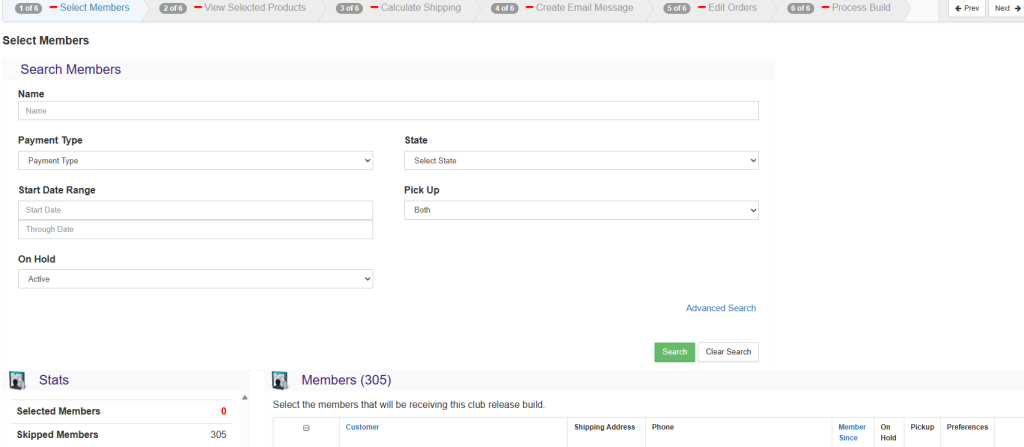
In step one, you select all the members you wish to include in the build. You can use the filter to narrow the list, and you can select all the results by clicking on the checkmark in the first row.
Proceed to the next step by clicking on Next. At any time during the build, you may leave the build and return later. All your progress will be saved.

Step 2
In step 2, you review or select the products for your release. If you are using a customer choice, you will review the products you set before the release began. If you’d like to make any changes, you will need to cancel this release, make the changes, then start again.
For winemaker selects clubs, this is when you will choose the wines the members will receive for the release.
Step 3
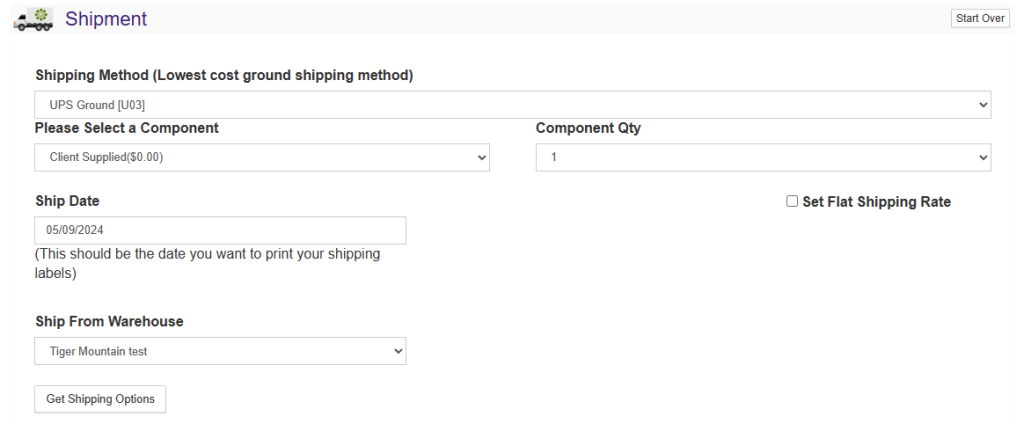
Step three is where you select the shipping method for your build. Even if this is a pickup only build, you will need to select a shipping method. The shipping component is for the packaging of the shipping. You can set up new components and component costs in the Shipping module, and the cost will be an additional charge to the club member. The ship date should be a future date where you anticipate printing labels. Finally, whichever warehouse you select is where the inventory for the release will be pulled from.
When you select “Get Shipping Options”, members will either be properly assigned the shipping method, give an error, give a warning, or be selected as pickup.

If there appears to be an unexpected problem with a member, you can select them and add them to a list of problem orders. This allows you to finish the build at hand and handle concerns later. Once satisfied, click Next.

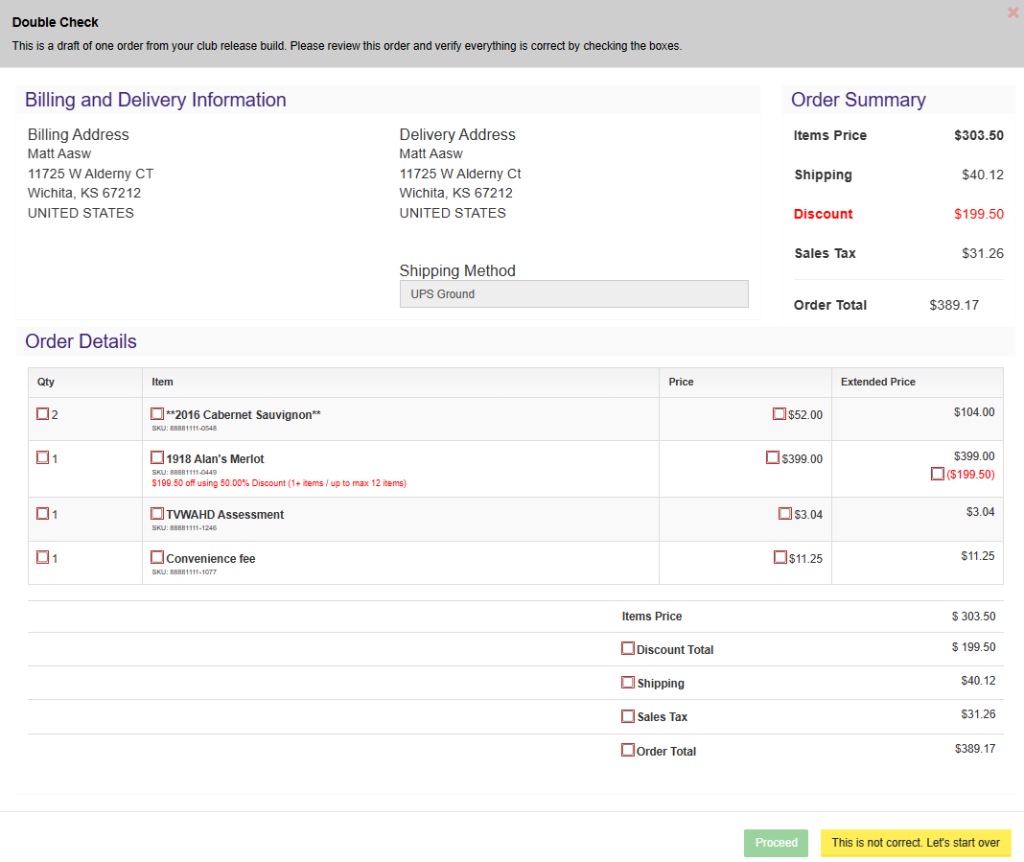
Now, a window will appear for you to verify all the information. Since you are working with many member orders at once, any mistake can be costly. For this reason, pay special care to verify the information here. When satisfied with a part of the order, click the checkmark next to it. When finished with the verification, proceed to step 4.

Step 4
Step 4 is used to send an email out to the members of the build, notifying them about the release. The email is designed in the Marketing module. It can be used to notify the members of the upcoming release, and in the case of customer choice clubs, the members will have the opportunity to edit their carts.
The email should be sent some time before the billing, so members have time to make any desired changes.
Step 5
In step 5, all the orders for your members are listed. You can review orders and make edits if necessary. You can also remove members from the build by clicking on the X button to the right.

Step 6
Step 6 is where you will finish the build. Do not click the Finish button until you are ready to charge the members. Once you click the button, the member’s cards will be preauthorized for the payment and the orders will be finalized. Once the billing cycle completes, you will be presented with a report on who was charged and who declined. You will now go to the fulfillment module to capture funds on the new orders and prepare them to be released.

