Related Resources
The OrderPort Users module is where you can manage the accounts that can login to OrderPort admin and the Point of Sale. The module is where you create accounts and configure their permissions.
Page Contents
Navigate to the Users Module
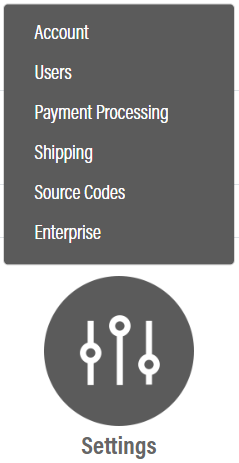
The Users module is in OrderPort Admin. Go to orderport.net to login.
Scroll down to the bottom of the dashboard page, and you will find the Settings option. Click the second option.
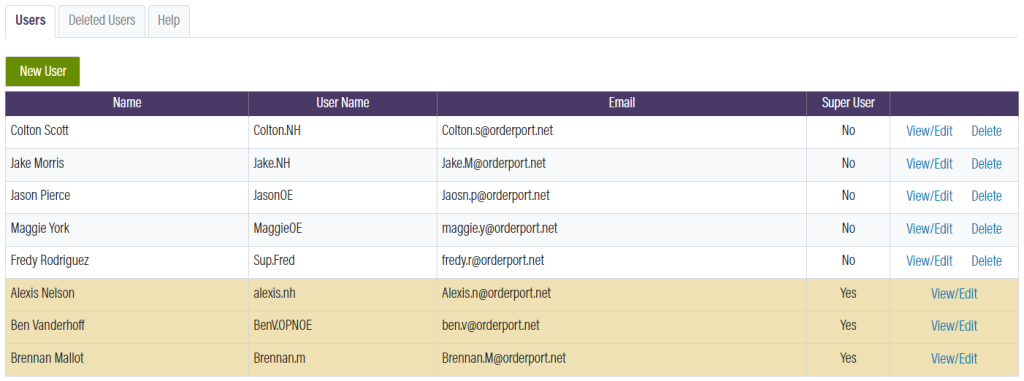
Once in the Users module, you will see a list of all your users.
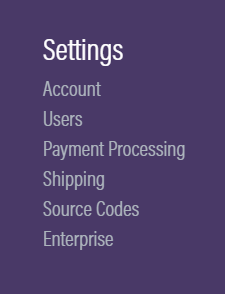
You can also hover over the three lines toward the top right of the dashboard page.
The Users module is under the Settings column.
Your users will be listed along with their usernames, emails, and super user status. If a user is a super user, this means their accounts can only be edited by an OrderPort agent.
Creating and Editing Users
Create a new user by clicking the ![]() button. Clicking edit on one of your existing customers will bring you to a similar page.
button. Clicking edit on one of your existing customers will bring you to a similar page.
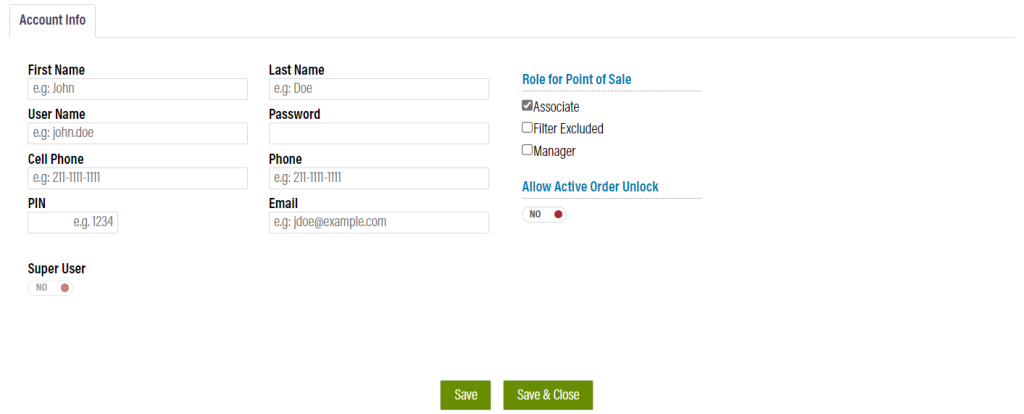
The User Name and Password is used to log into OrderPort admin, as well as the point of sale app.
The Cell Phone field is optional, but the Phone field is required.
The PIN field is used on the point of sale. It is needed to login, clock in, and it may be required to make a refund.
Roles for Point of Sale:
- Associate: This is a user with regular permissions.
- Filter Excluded: This makes it so when looking for orders, you cannot search for orders taken by this user. This can be given for employees who will be using the app but not taking any orders.
- Manager: This user will have access to managerial actions.
The Allow Active Order Unlock option allows this user to open an order that has started payment on another device.
If you are creating a user for the first time, click the ![]() button to get access to more configuration options.
button to get access to more configuration options.
Once you save, you will notice the option to add two-factor authentication.


The Access Tab
The Access tab will also appear once you save the changes in the Account Info tab. Here, you can manage what OrderPort Admin modules this user has access to.
On the right side, there are several preset roles you can select for this user. Each role automatically configures the permissions for each module.
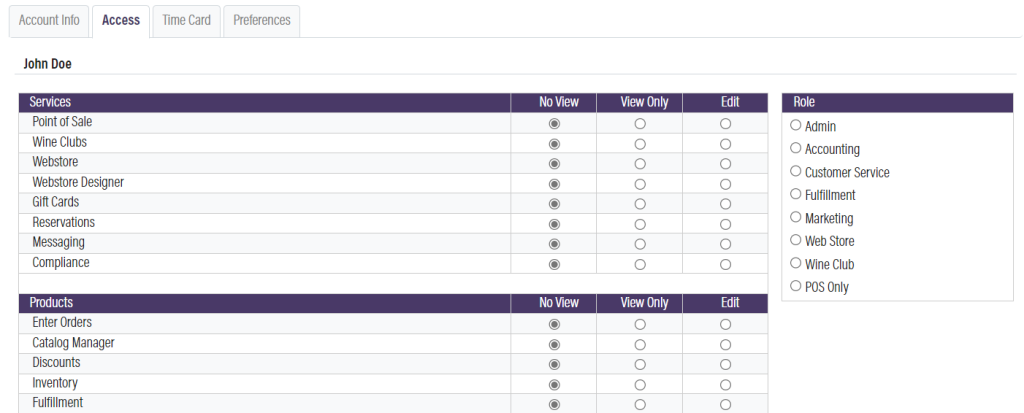

Selecting No View prevents the user from entering the module. View Only allows the user to enter the module without making changes. The Edit option allows the user to make changes.
Once you finish configuring this tab, scroll down and click ![]()
![]()
![]()
