This lesson covers how to make, view, and start orders for reservations on the Point of Sale and Restaurant.
Page Contents
Booking Reservations
If a customer calls you over the phone to book a reservation, or you need to manually book a reservation for any reason, you can do so from the Point of Sale. On the right column of buttons, tap Reservations.
To select the date of the reservation to be booked, tap on the “Change Date” button at the top right of the page.
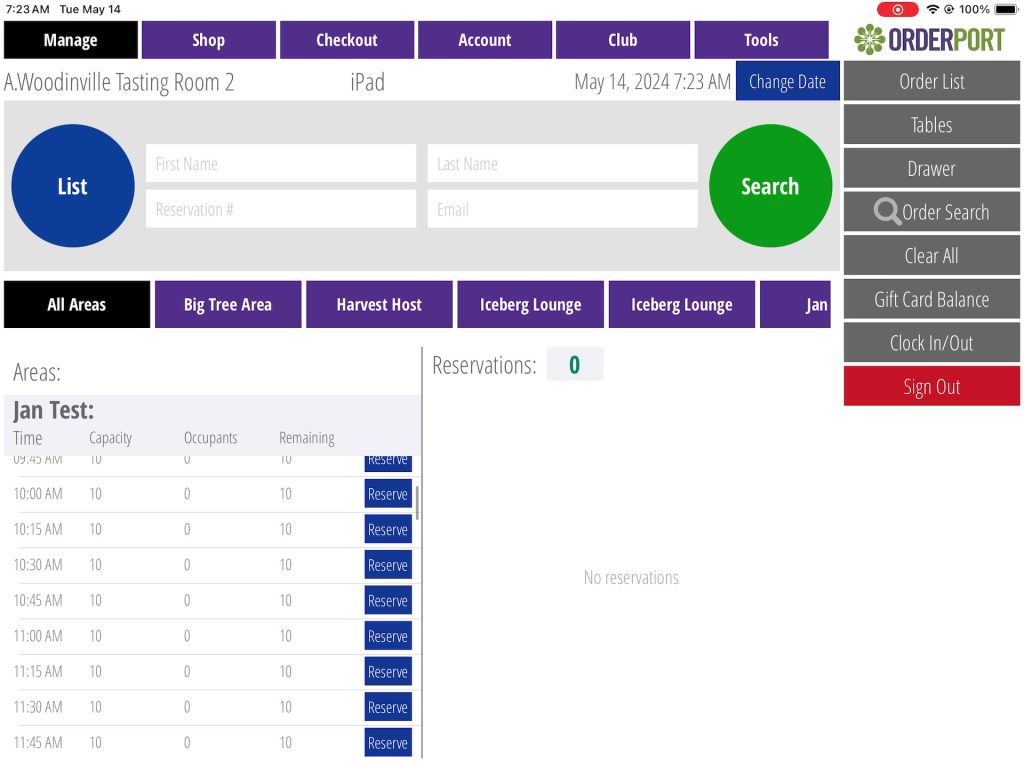
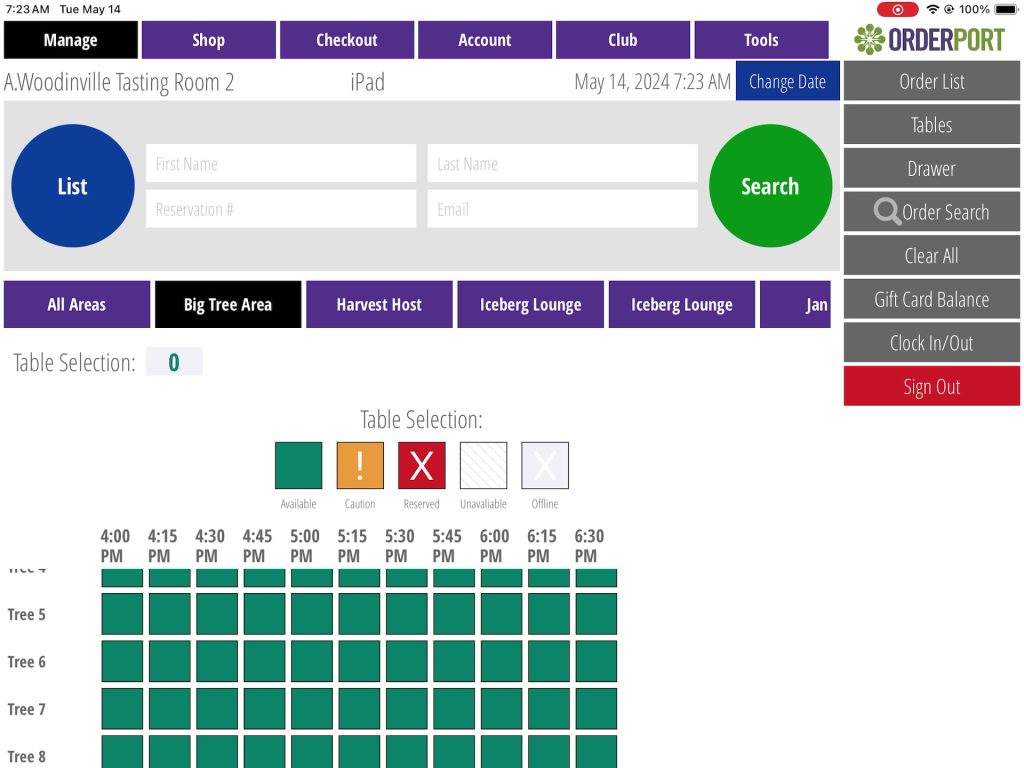
Next, select the area that they’d like to reserve. Depending on the area, the selection options may appear different. If the area includes tables, you can book a reservation by tapping on a green square that represents a table and a time. If the area does not have tables set up in OrderPort, select reserve at the desired time slot.
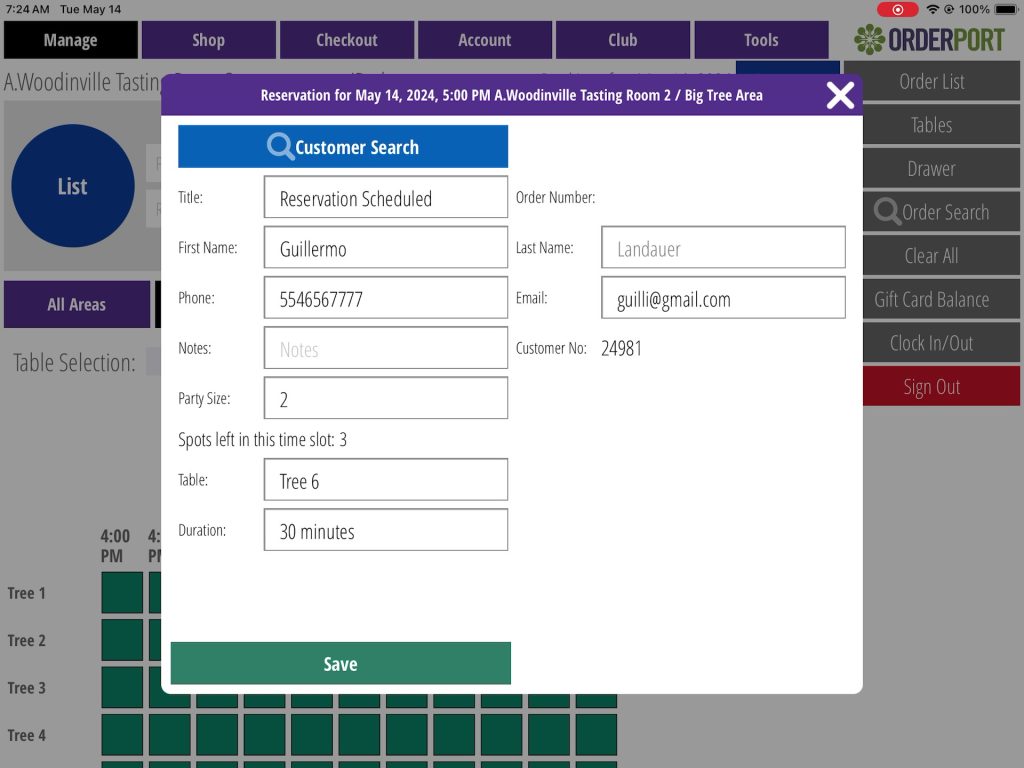
If the customer has an account, use the customer search feature. Otherwise, fill out the information manually.
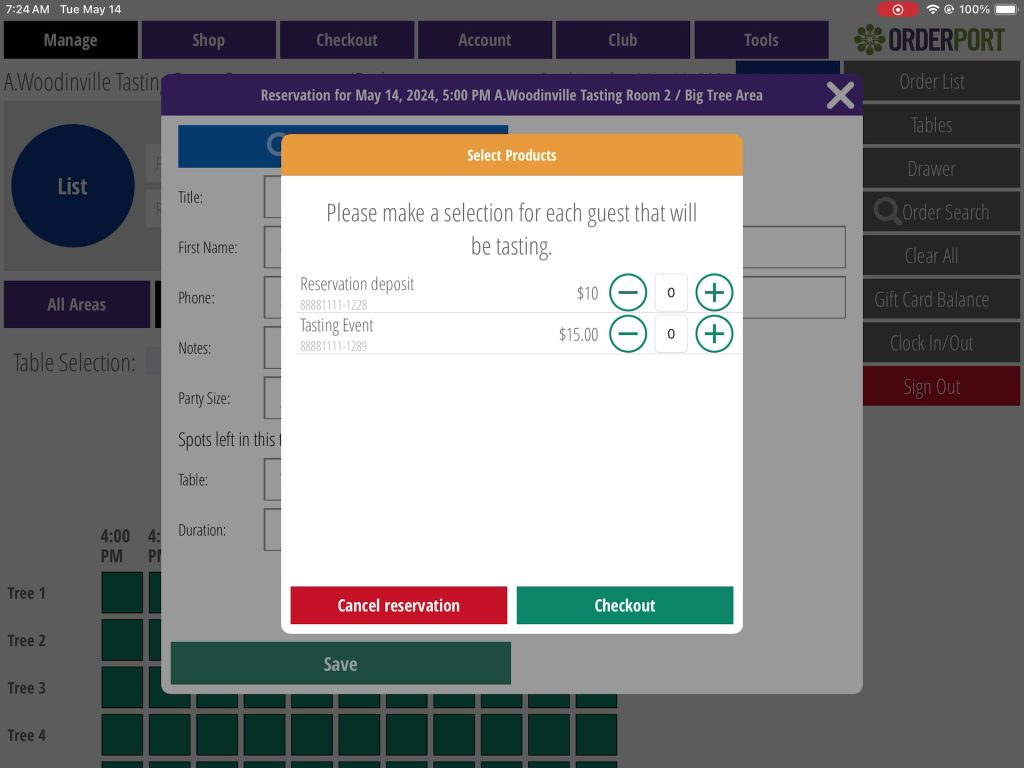
If this reservation area requires a product purchase, you can add the product and select the payment method. You can also choose to skip this step by tapping checkout and ignoring the warning about product selection.
Viewing and Seating Reservations
Reservations for the current date will appear when you initially enter the reservations section. To seat a customer from the reservation, tap on the Start Order button. From here, the process is the same as any other order.
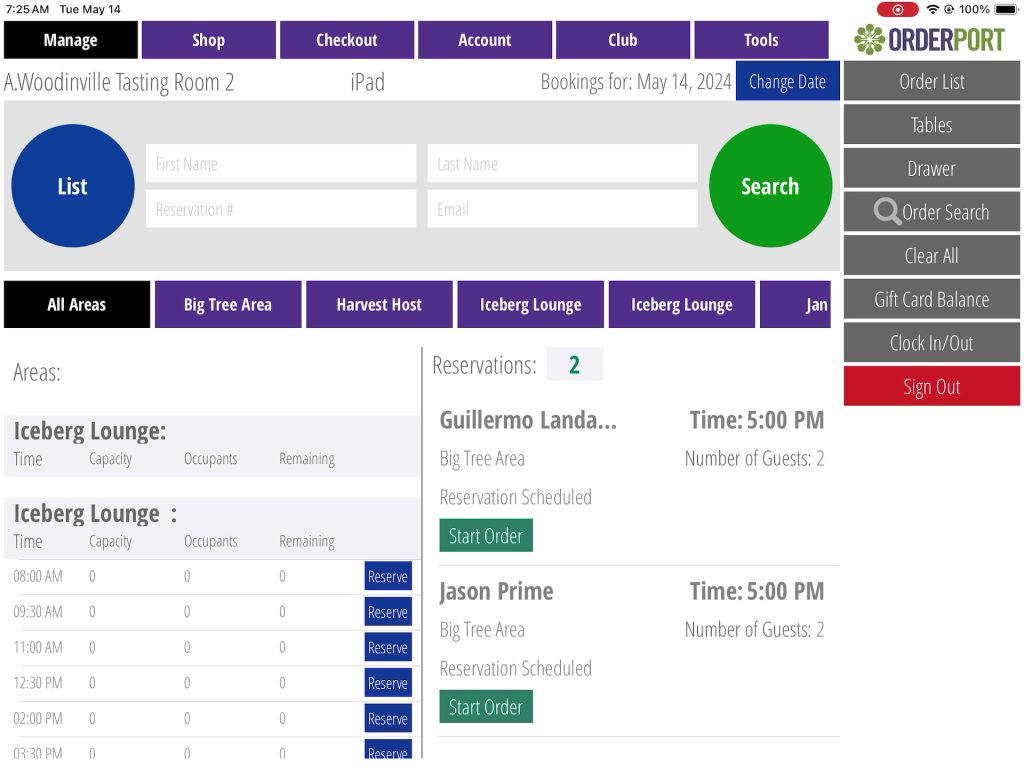
Table Map Editor
Table maps and layouts are customized in the Point of Sale. In this way, you can have customers reserve specific tables which are tied to physical locations. Only users with reservations module access on OrderPort admin will have access to the table maps.
Go to the Tools tab, then tap Table Maps.
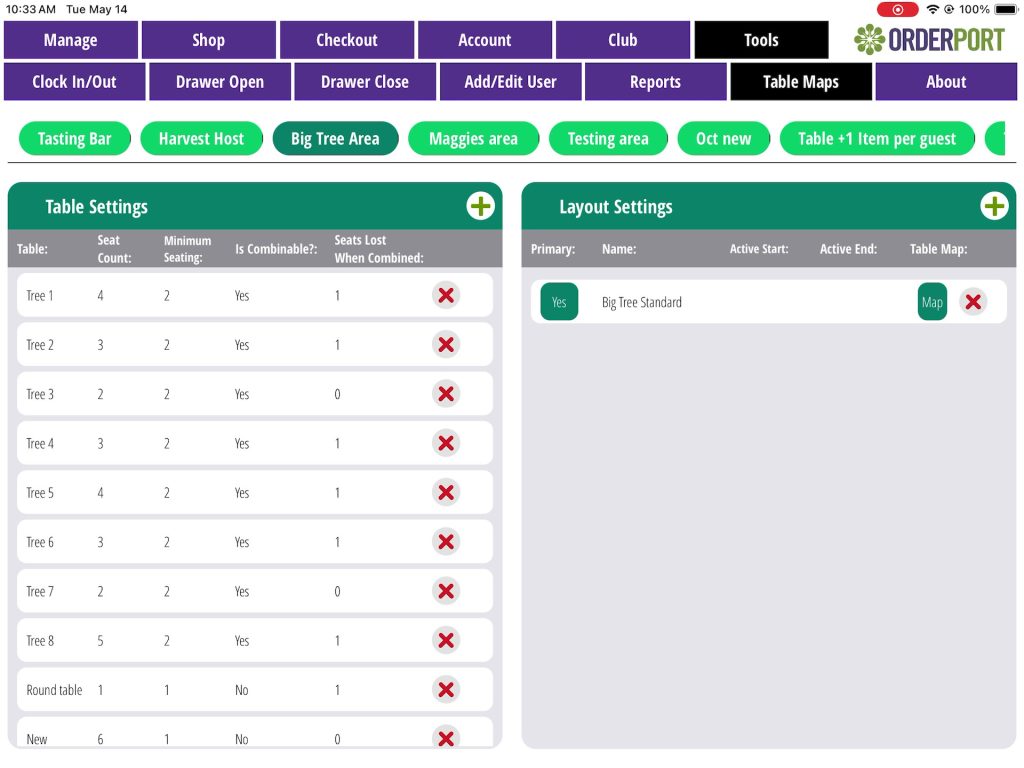
You will see each area listed on the top of this tab. Each area will have a list of tables. On the right, you will find the layout settings. By tapping on Map, you can choose how these tables are mapped. By setting up the map to be similar to the physical space of the area, you can easily associate reservations and customers with tables.
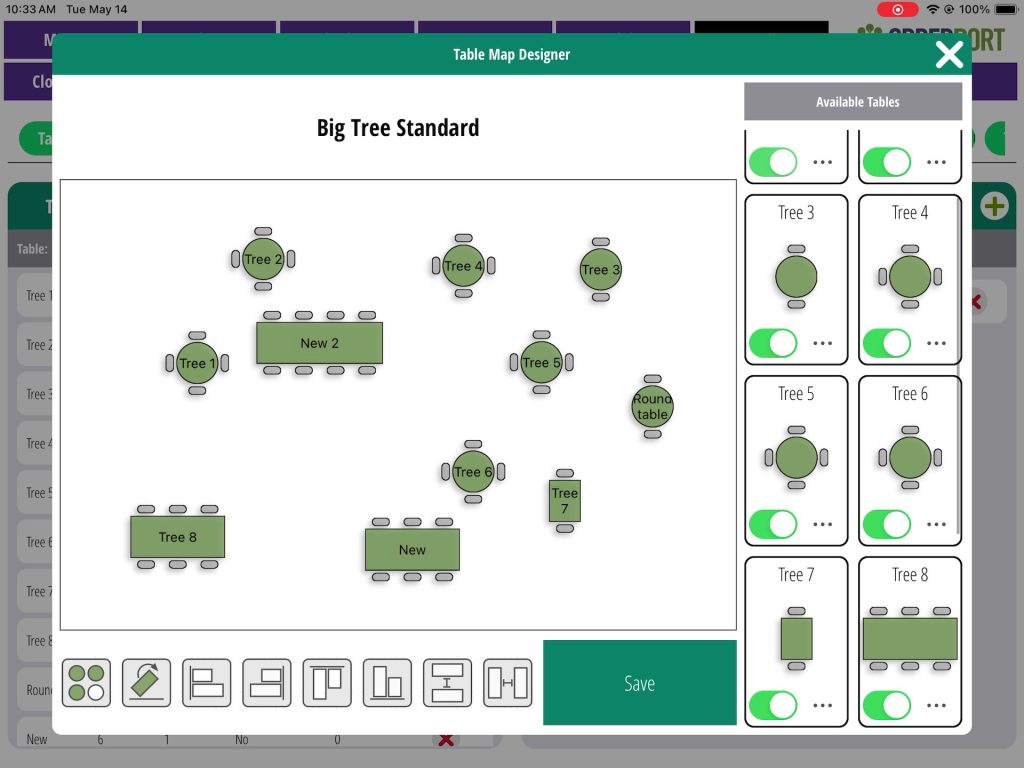
On the right, you can toggle tables and change the style of the tables by tapping on the three dots. You can take these tables and drag them across the screen to move them. For advanced features, you can use the buttons at the bottom. The first button allows you to select more than one at a time. After selecting tables, you can apply any of the other transformations on those tables. Once finished with your customizations, tap save.
